Running out of stock is one of the most costly mistakes an online store can make. Lost sales, frustrated customers, and damaged reputation — all because nobody noticed the inventory dropping.WooCommerce does have basic low-stock email notifications, but they're limited. They only go to the admin email, you can't customize the threshold per product, and …
Running out of stock is one of the most costly mistakes an online store can make. Lost sales, frustrated customers, and damaged reputation — all because nobody noticed the inventory dropping.
WooCommerce does have basic low-stock email notifications, but they’re limited. They only go to the admin email, you can’t customize the threshold per product, and integrating with tools like Slack or SMS requires paid plugins.
There’s a better way. Using WooCommerce’s built-in webhooks combined with free automation tools, you can build a flexible inventory alert system that notifies you anywhere — Slack, Telegram, SMS, or a custom dashboard.
This guide walks you through the entire setup.
Understanding WooCommerce Webhooks
A webhook is simply an automated message sent from one application to another when something happens. WooCommerce includes webhook functionality out of the box — no plugins required.
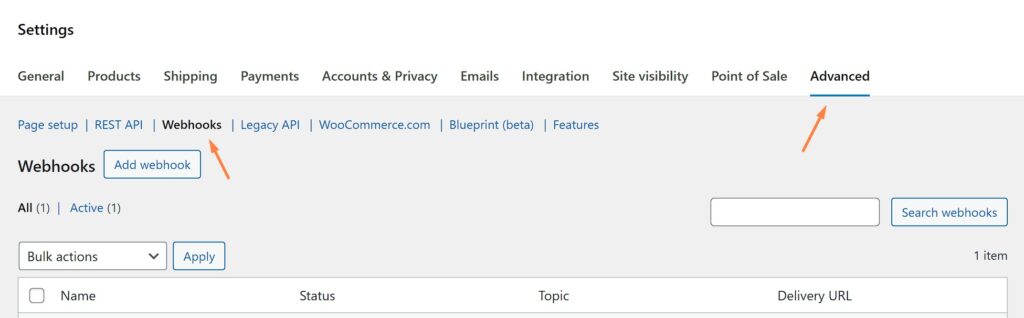
You’ll find it under WooCommerce → Settings → Advanced → Webhooks.
WooCommerce can send webhooks for various events: orders created, customers updated, products changed, and more. For inventory alerts, we care about the Product updated event. Every time a product’s data changes — including stock quantity — WooCommerce fires this webhook and sends the product data to your specified URL.
The payload includes everything: product ID, name, SKU, price, and crucially, stock_quantity and stock_status. Your receiving endpoint can inspect these values and decide whether to trigger an alert.
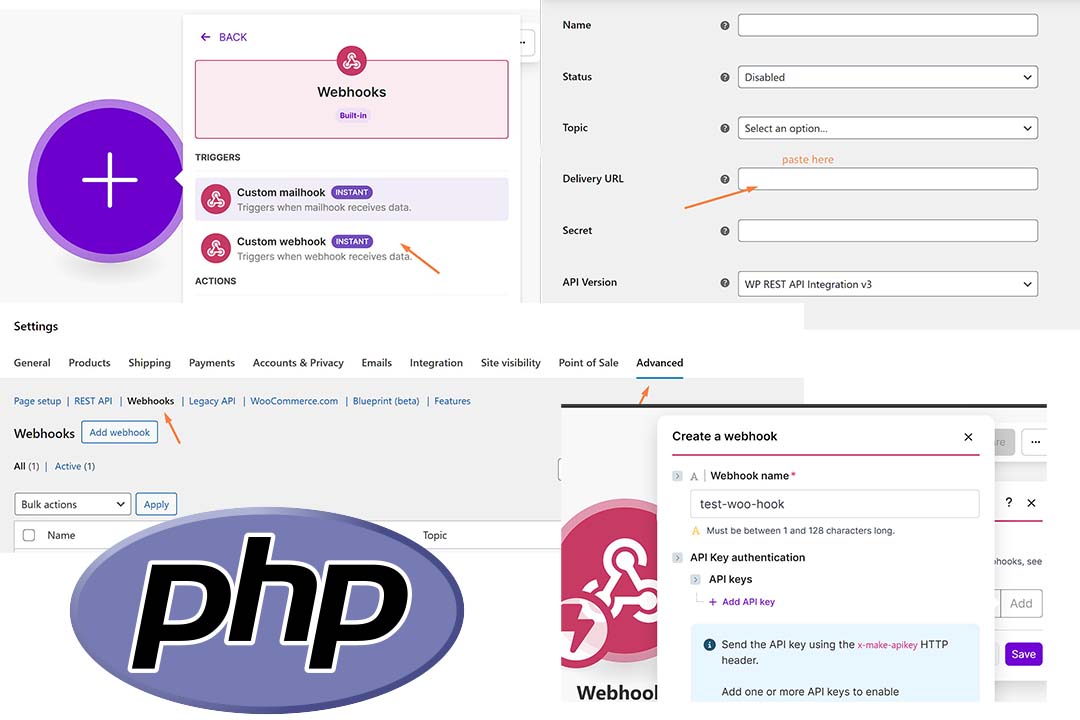
Step 1: Create the Webhook in WooCommerce
Start by setting up the webhook in your store.
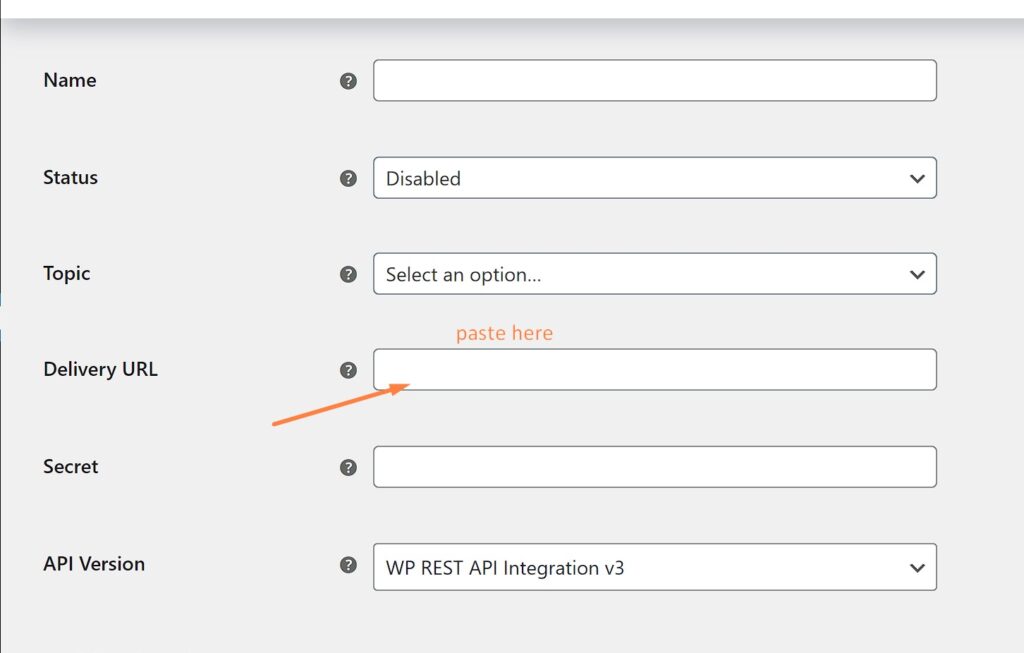
Go to WooCommerce → Settings → Advanced → Webhooks
Click Add webhook

Fill in the details:
Name: Low Stock
Alert Status: Active
Topic: Product updated
Delivery URL: Leave blank for now (we’ll get this from Make.com or your custom endpoint)
Secret: Generate a random string for security, or leave it for WooCommerce to auto-generate
API Version: Keep V3
Save Webhook
Step 2: Choose Your Automation Platform
You have three main options depending on your technical comfort level and budget.
Make.com is the most flexible free option. The free tier gives you 1,000 operations per month, which is plenty for inventory monitoring. It has a visual builder and pre-built integrations with Slack, email, SMS services, and more.
Zapier works similarly but the free tier is more restrictive — only 100 tasks per month and limited to two-step automations. Still viable for smaller stores.
Custom PHP endpoint gives you complete control. If you’re comfortable writing code and have server access, this is the most powerful option with zero ongoing costs.
We’ll cover Make.com as the primary method, then show a custom PHP alternative for developers.
Step 3: Setting Up Make.com
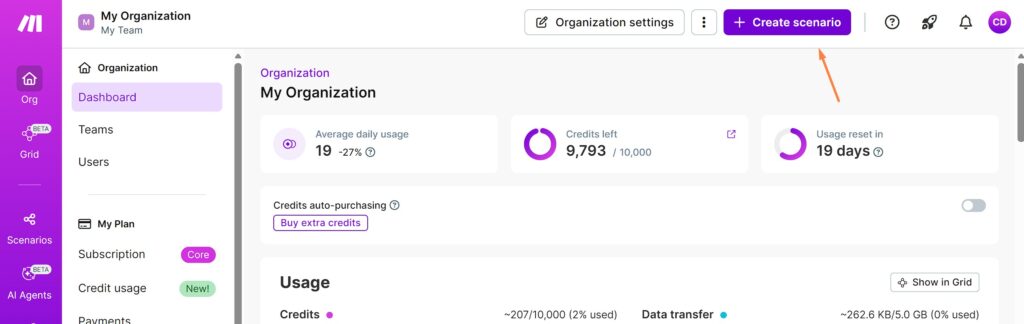
Create a free account at make.com if you don’t have one.
Create a new scenario:
Click Create a new scenario
Search for Webhooks and select Custom webhook
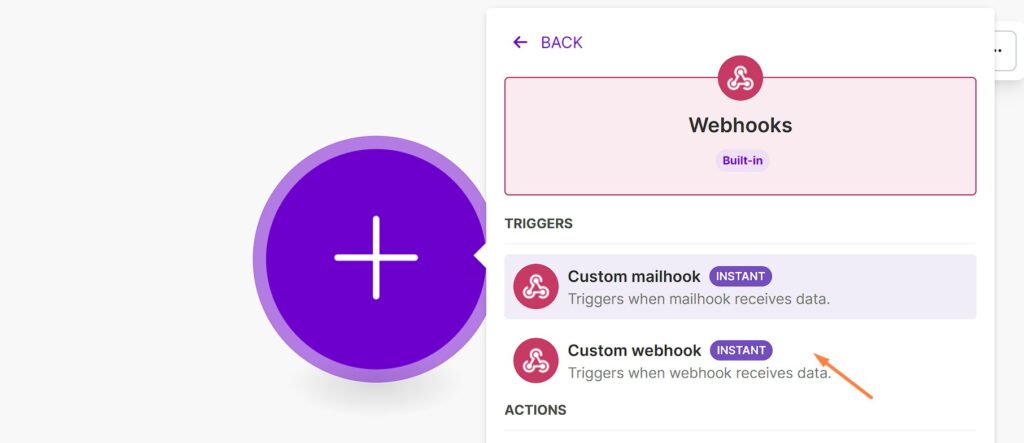
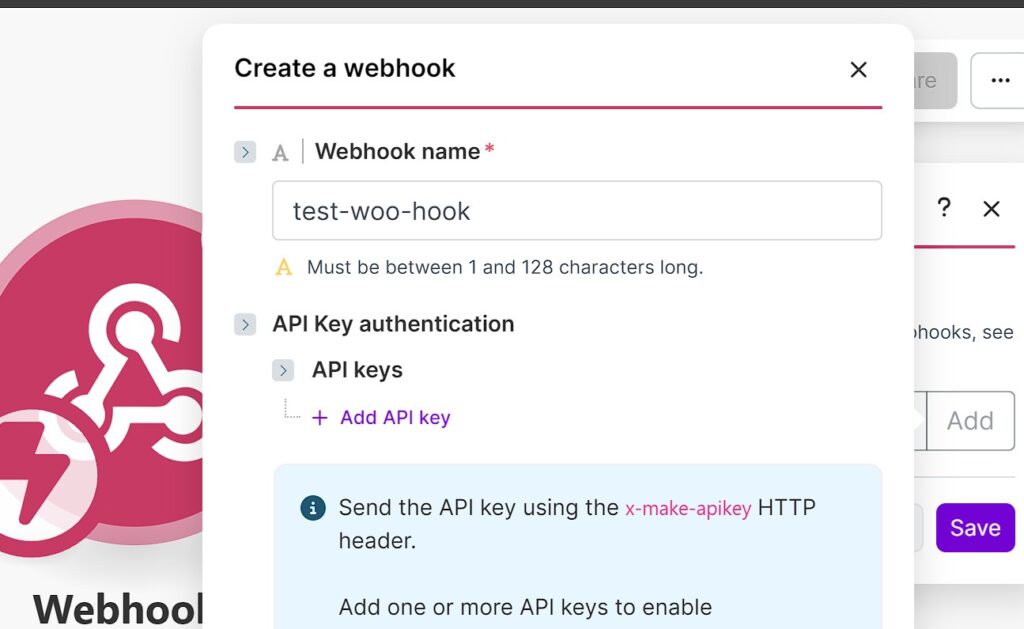
- Click Add to create a new webhook
- Give it a name like “WooCommerce Product Updates”
- Click Save then Copy address to clipboard

This URL is what you’ll paste into WooCommerce’s Delivery URL field. Go back to your webhook settings in WooCommerce and add it there.
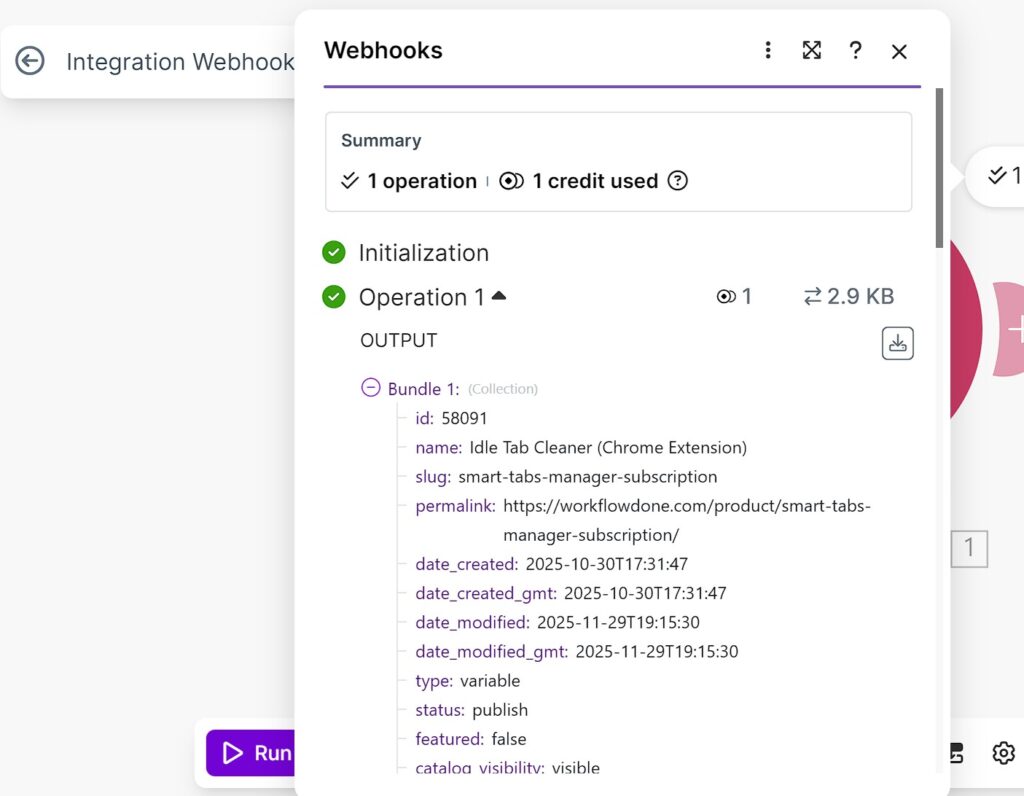
Test the connection:
After saving the WooCommerce webhook, edit any product in your store (just change the description and save). Go back to Make.com and click Run once. You should see the product data come through.
Add a filter:
- Click the line between the webhook module and add a Filter. Set it to only continue when:
- stock_quantity is less than your threshold (e.g., 5)
manage_stock equals true
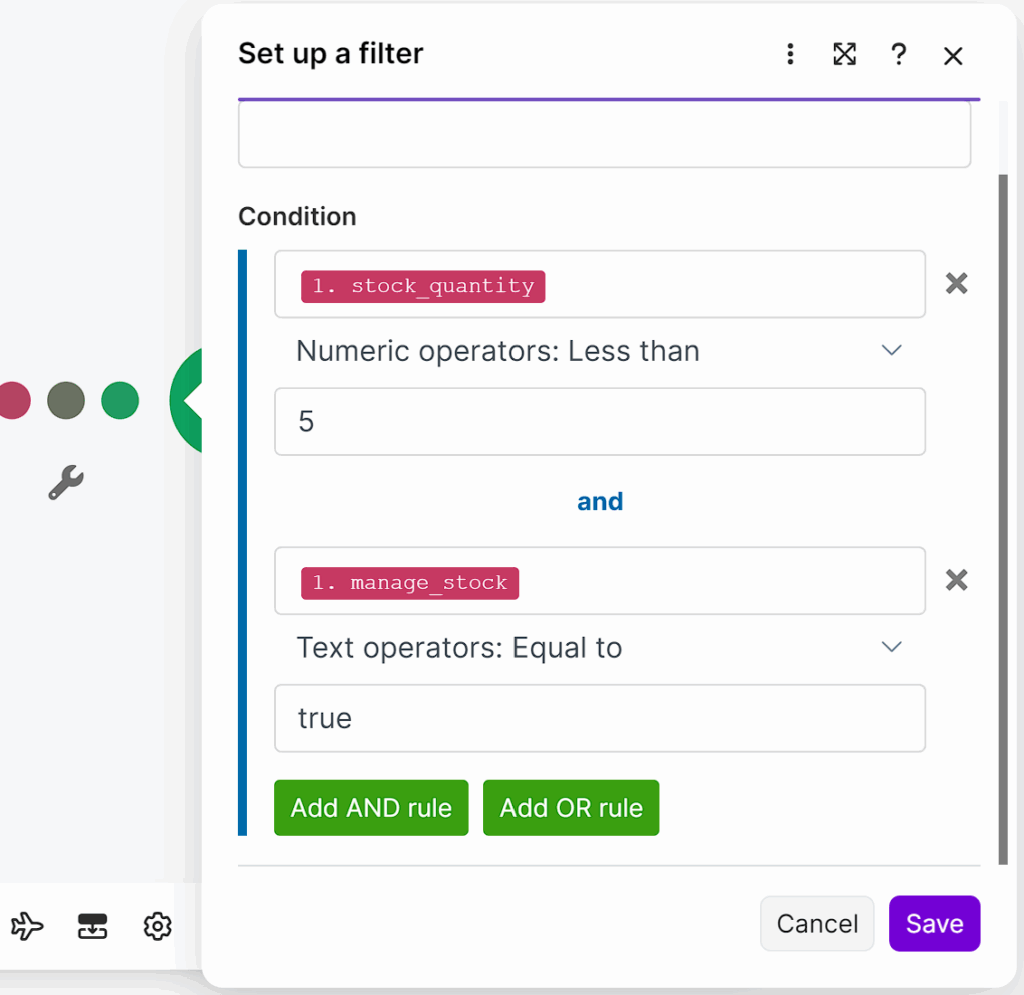
This prevents alerts for products that don’t track inventory or aren’t actually low.
Add your notification:
After the filter, add your preferred notification method.
For Email, add the Email module → Send an Email. Use the same variables to build your message.
For Slack, add the Slack module → Send a Message. Connect your workspace and choose a channel. Format your message:
For Telegram, add the Telegram Bot module. You’ll need to create a bot via BotFather first and get your chat ID.
Activate the scenario:
Turn on scheduling (the toggle at the bottom left) and set it to run immediately when data arrives.
Step 4: Custom PHP Endpoint (Developer Option)
If you prefer handling this on your own server, here’s a simple PHP script that receives the webhook, checks stock levels, and sends a Slack notification.
					<?php
// webhook-receiver.php

// Verify the request is from WooCommerce (optional but recommended)
$secret = 'your-webhook-secret';
$signature = $_SERVER['HTTP_X_WC_WEBHOOK_SIGNATURE'] ?? '';
$payload = file_get_contents('php://input');

$expected_signature = base64_encode(hash_hmac('sha256', $payload, $secret, true));

if ($signature !== $expected_signature) {
    http_response_code(401);
    exit('Unauthorized');
}

$product = json_decode($payload, true);

// Check if this product tracks stock and is low
$threshold = 5;

if (
    isset($product['manage_stock']) &&
    $product['manage_stock'] === true &&
    isset($product['stock_quantity']) &&
    $product['stock_quantity'] < $threshold
) {
    // Send Slack notification
    $slack_webhook = 'https://hooks.slack.com/services/YOUR/SLACK/WEBHOOK';

    $message = [
        'text' => "⚠️ *Low Stock Alert*\n" .
                  "Product: {$product['name']}\n" .
                  "SKU: {$product['sku']}\n" .
                  "Current Stock: {$product['stock_quantity']}\n" .
                  "Link: {$product['permalink']}"
    ];

    $ch = curl_init($slack_webhook);
    curl_setopt($ch, CURLOPT_POST, true);
    curl_setopt($ch, CURLOPT_POSTFIELDS, json_encode($message));
    curl_setopt($ch, CURLOPT_HTTPHEADER, ['Content-Type: application/json']);
    curl_setopt($ch, CURLOPT_RETURNTRANSFER, true);
    curl_exec($ch);
    curl_close($ch);
}

http_response_code(200);
echo 'OK';
Upload this to your server and use its URL as the WooCommerce webhook delivery URL.
To add SMS via Twilio, replace or extend the Slack section:
					// Send SMS via Twilio
$account_sid = 'your_account_sid';
$auth_token = 'your_auth_token';
$twilio_number = '+1234567890';
$your_number = '+0987654321';

$message_body = "Low Stock: {$product['name']} - {$product['stock_quantity']} left";

$ch = curl_init("https://api.twilio.com/2010-04-01/Accounts/{$account_sid}/Messages.json");
curl_setopt($ch, CURLOPT_POST, true);
curl_setopt($ch, CURLOPT_USERPWD, "{$account_sid}:{$auth_token}");
curl_setopt($ch, CURLOPT_POSTFIELDS, http_build_query([
    'From' => $twilio_number,
    'To' => $your_number,
    'Body' => $message_body
]));
curl_setopt($ch, CURLOPT_RETURNTRANSFER, true);
curl_exec($ch);
curl_close($ch);
Step 5: Avoiding Alert Spam
If a product hovers around the threshold — stock drops to 4, you get an alert, someone cancels an order, stock goes to 5, then another sale drops it to 4 — you’ll get repeated alerts.
Solution: Track what you’ve already alerted.
For Make.com, add a Google Sheets module or Data Store to log each alert. Before sending a notification, check if you’ve already alerted for this product in the last 24 hours.
For the PHP approach, use a simple file or database:
					$alert_log = '/path/to/alert_log.json';
$alerts = file_exists($alert_log) ? json_decode(file_get_contents($alert_log), true) : [];

$product_id = $product['id'];
$now = time();
$cooldown = 86400; // 24 hours

if (isset($alerts[$product_id]) && ($now - $alerts[$product_id]) < $cooldown) {
    // Already alerted recently, skip
    http_response_code(200);
    exit('OK');
}

// Send alert...

// Log this alert
$alerts[$product_id] = $now;
file_put_contents($alert_log, json_encode($alerts));
Step 6: Logging Alerts to Google Sheets
Having a record of all low-stock alerts helps you spot patterns. Maybe certain products always run low on Fridays, or a supplier is consistently late.
In Make.com, add a Google Sheets → Add a Row module after your notification. Map the columns:
Date/Time: {{now}}
Product Name: {{name}}
SKU: {{sku}}
Stock Level: {{stock_quantity}}
Threshold: {{low_stock_threshold}} (if using custom thresholds)
Over time, this becomes a useful inventory management reference.
Wrapping Up
You now have a flexible, free inventory alert system that doesn’t rely on bloated plugins or expensive services.
The setup takes about 30 minutes, but it saves hours of manual inventory checking and prevents costly stockouts. You can extend this further — trigger automatic reorders, update a dashboard, or notify your suppliers directly.
Webhooks are one of the most underused features in WooCommerce. Once you understand the pattern, you can automate almost anything: order routing, customer segmentation, abandoned cart recovery, and more.
Need help setting up automations for your WooCommerce store? Check out our other guides or get in touch.

Temo Berishvili
Founder of Workflowdone.com